If you’re new to WordPress, it might feel overwhelming to write and publish first blog post in WordPress. It involves several steps, including accessing the post editor, understanding its various areas, using blocks to write different types of content such as headings, paragraphs, lists, and images, adjusting post settings, and finally publishing the post.
Table of Contents
Let’s get started so you can finally share your ideas with the world through your very first WordPress post.
Step 1: Open the Post Editor to Create a New Post
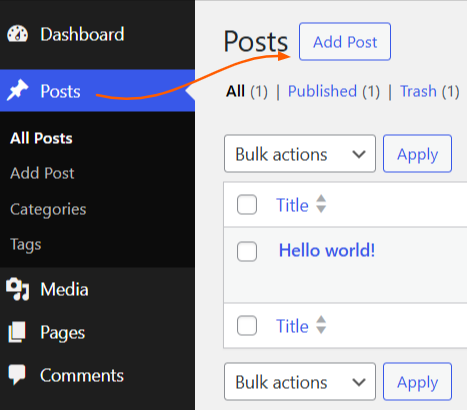
- Log in to your WordPress Admin Dashboard.
- From the navigation sidebar on the left, click on Posts. This will show you a list of all your existing articles.
- Click the Add Post button.
Step 2: Add Post Content
After clicking the Add Post button, you’ll be redirected to the Post Editor, where you’ll write and publish the content for your blog post.
The screenshot below highlights the key areas of the editor. Each numbered callout corresponds to an important feature, from adding your title (1) to publishing the post (10).
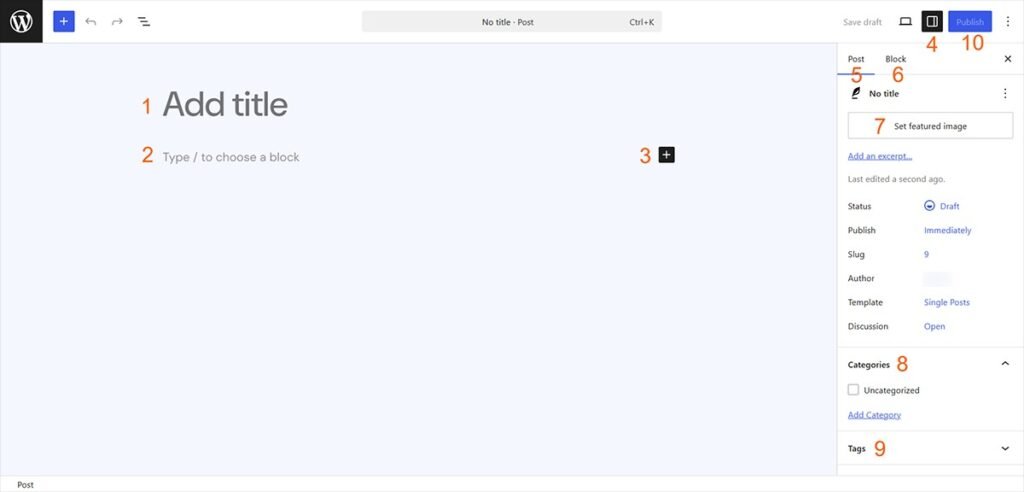
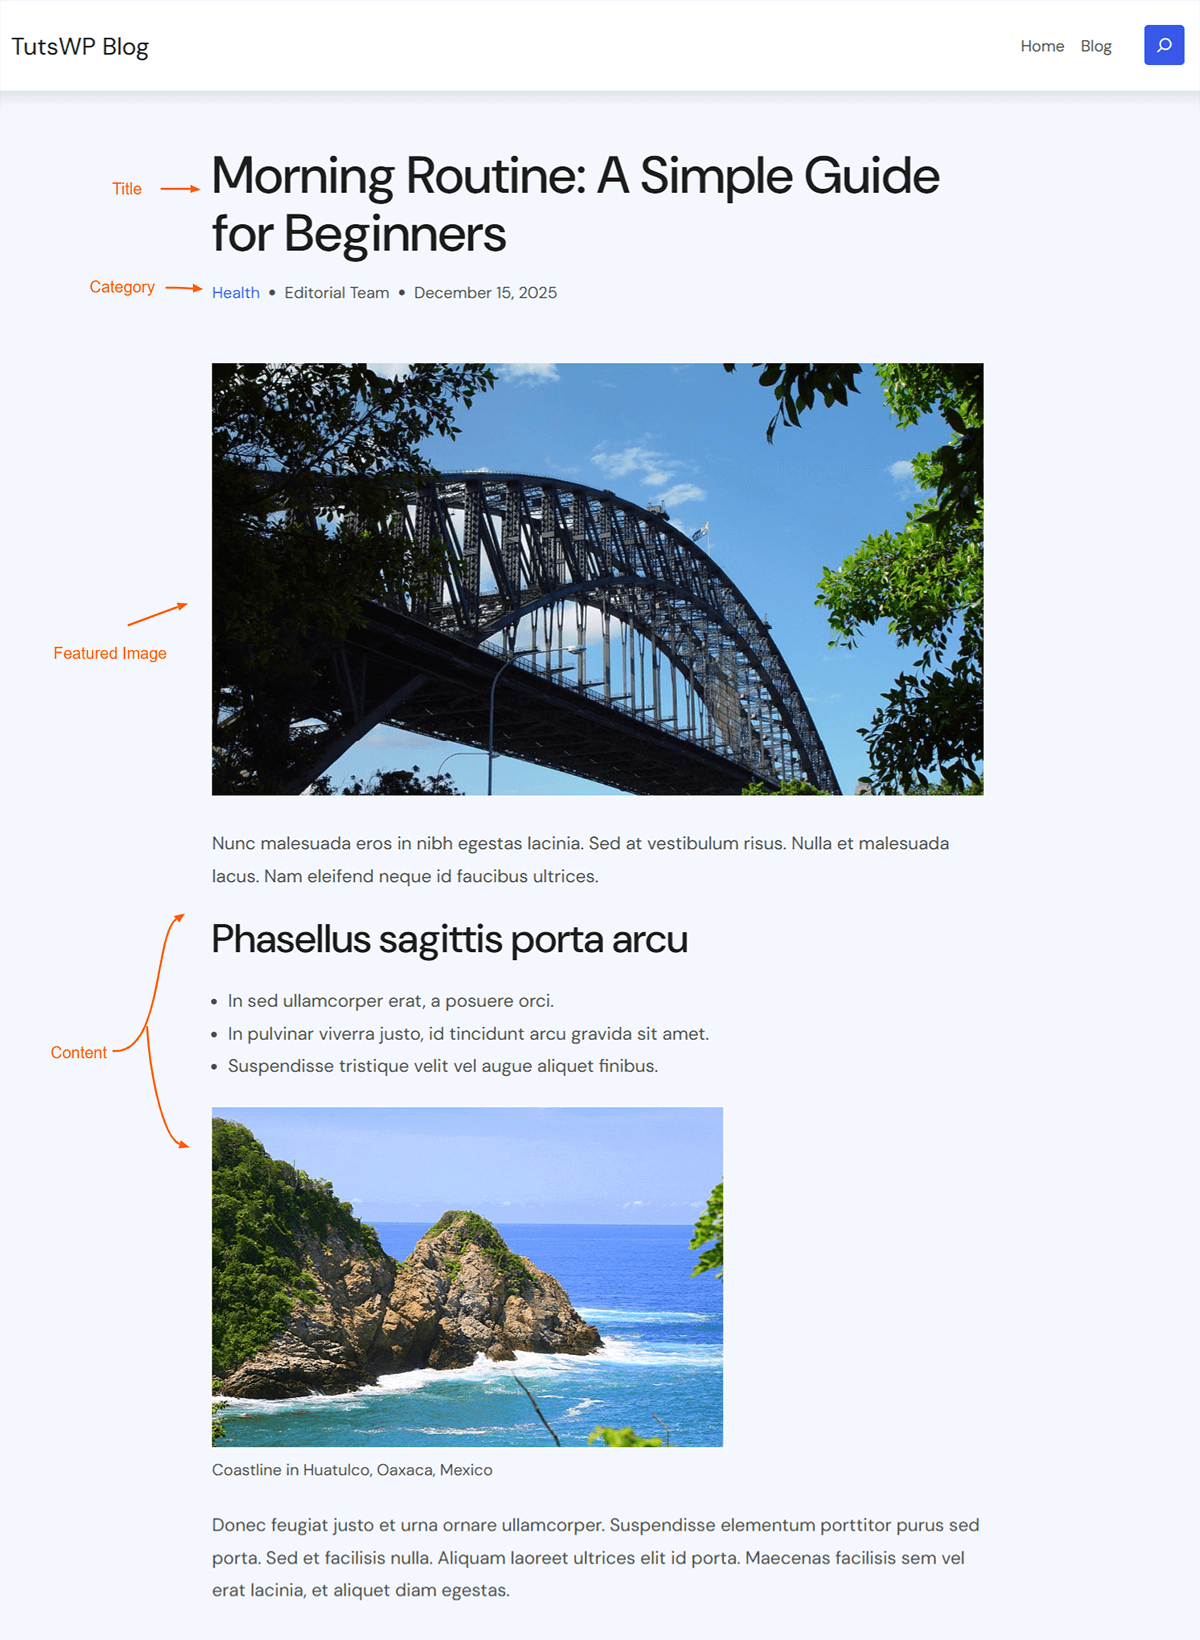
- Click in the Add Title (1) area to type your title. Example: “Morning Routine: A Simple Guide for Beginners”
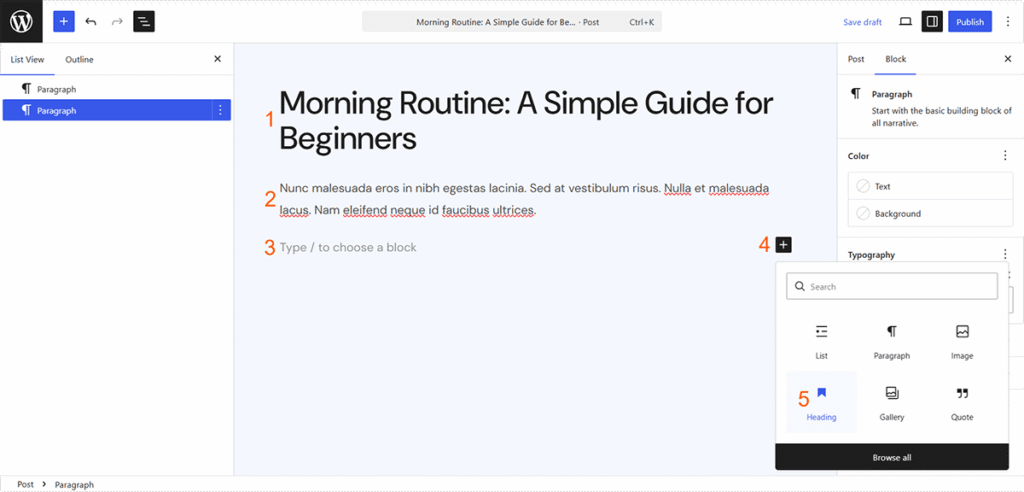
- After writing the title, press the Enter key on your keyboard to begin writing your content. WordPress uses a block-based editor, which means different types of content, such as paragraphs, headings, lists, images, etc can be added using blocks.
- To add a simple paragraph, you can click on “Type / to choose a block” (2) area and start writing.
- To add other types of content, click over the text that says “Type / to choose a block“.
- A plus (+) icon (3) will appear next to it. Click on it and a list of blocks will appear; choose the block type based on the content you want to add to your post.
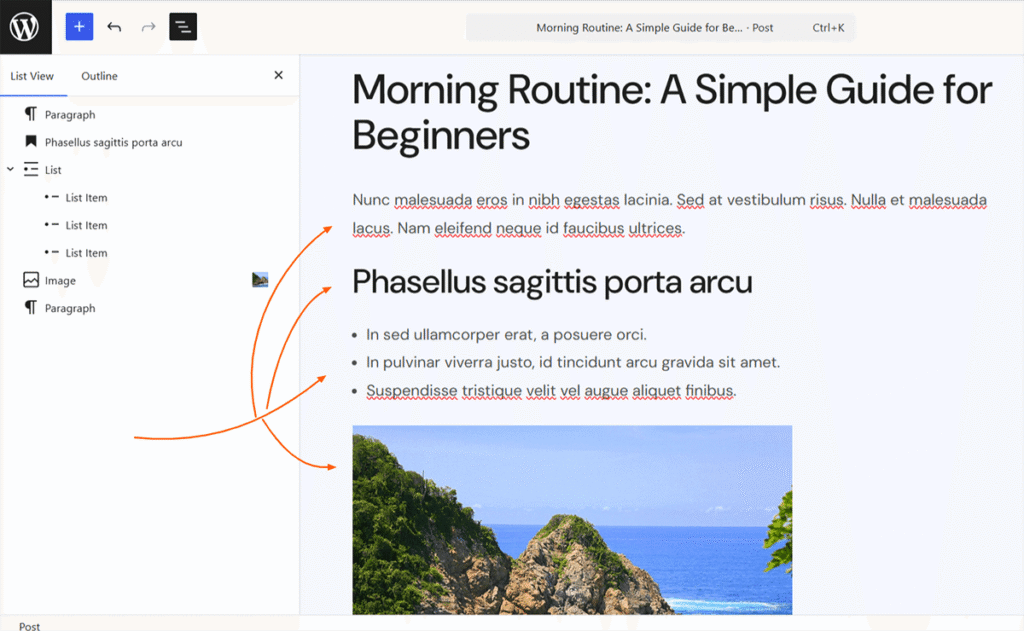
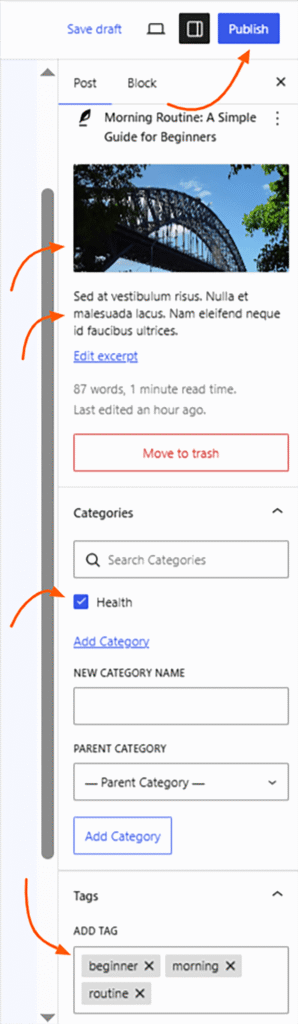
As depicted in the screenshot above, I’ve added a paragraph, a heading, a list & image. Each block has its own secret settings to achieve the design & content style you need.
Finding it difficult to get around the Block Editor (Gutenberg)? Don’t worry, most people find it a bit of a maze at first!
Try it out yourself
If you want to dive deeper into every single block available and features of Block Editor, check out the Official Gutenberg demo website (Playground) where you can practice and master it.
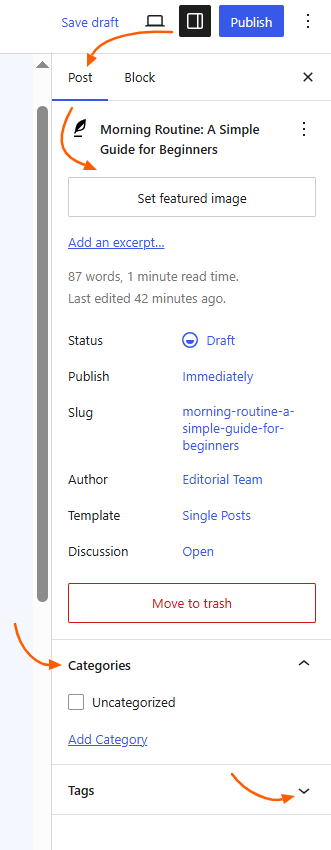
Step 3: Configure Post Settings
The featured image, excerpt, category, tags, and other settings are applied to the post from the settings sidebar.
- Click the Settings Sidebar (4) located at the top-right corner (before the Publish button) to open post and block settings panel.
- Click over Post (5) tab to access post-related settings.
- Click the Set Featured Image (7) button, then choose or upload an image that represents your post.
- Below it, click Add an excerpt link to add a short description of your post. This excerpt may appear in post listing (blog, categories pages), depending on your theme.
- Scroll down to the Categories (8) toggle. Here, you can select existing categories or click Add New Category to create a new one.
- Go to Tags (9) and click over input that says ADD TAG to enter tags related to your post. Press Enter after each tag to add it.
Tip: Always select at least one category for your post. Posts without categories may be harder for readers to find.
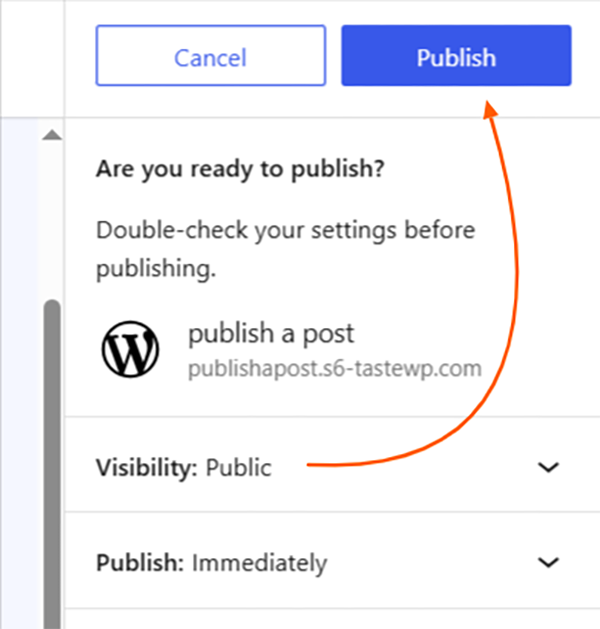
Step 4: Publish First Blog Post in WordPress
- Once you’ve finished writing your content and finalized the post settings, click the blue Publish (10) button in the top-right corner. When WordPress asks for confirmation, click Publish again.
- After publishing, you’ll see a View Post with a link, so click on it to see your live blog post on your website.
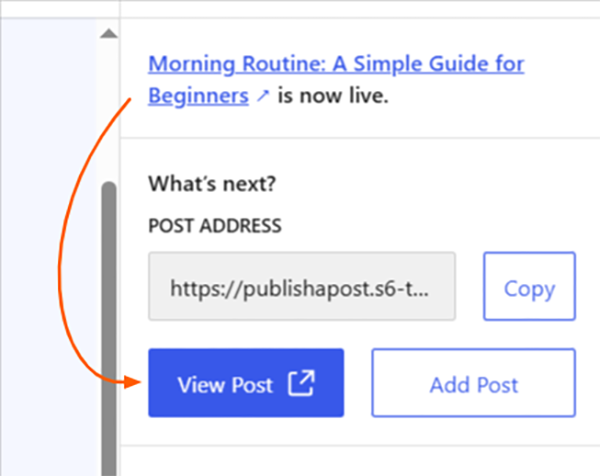
That’s all it takes! Your new post is now live and ready for readers! The screenshot below shows a preview of how your finished content will appear, based on your chosen theme. By mastering these simple steps, you can publish your ideas with confidence anytime.
Next Steps
Congratulations on making your ideas live online!
Having your voice officially part of the web is a great start. However, once readers visit your website, the first thing they notice is the design. The style and layout of your content determine whether visitors stay to explore your world or leave before finishing your first paragraph.
The right theme makes all the difference. To get you started, we’ve curated two collections tailored for different needs