Want to add features to your WordPress block theme without affecting the original theme? A child block theme is the answer!
In WordPress, a child theme acts like an extension for your main theme (called the parent theme). It allows you to add customizations without altering the parent theme’s files.
This guide shows you how to easily create a child block theme for free with the help of the “Create Block Theme” plugin. It’s best for beginners who want to customize their WordPress website without writing code.
Table of Contents
What You’ll Need:
- Access to the WordPress dashboard of your website.
- A block theme is already activated (make sure the theme you want to customize is active). You can check this by going to Appearance > Themes in your WordPress dashboard.
If you’re still looking for a new design for your WordPress site, follow the tutorial linked below:
Beginner’s Guide to Install Theme in WordPress (2 Methods for Free & Premium Themes)
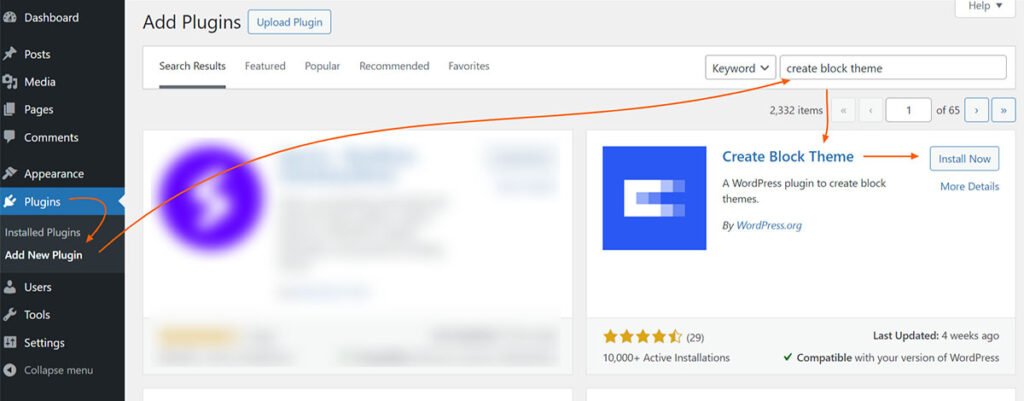
Step 1: Install the “Create Block Theme” Plugin
The “Create Block Theme” plugin helps you build a child theme of your block theme in just a few clicks. It’s a free plugin available directly in your WordPress dashboard. Search for “Create Block Theme” in the plugin installation page and install it.
Installing plugins is a straightforward process, but it can be helpful to have a visual guide, especially if you’re new to WordPress. Our detailed guide linked below provides step-by-step instructions with screenshots to walk you through installing any plugin, including “Create Block Theme”
Step 2: Create a Child Block Theme
Once you’ve installed the Create Block Theme plugin, follow these steps to create a child block theme based on your currently active block theme:
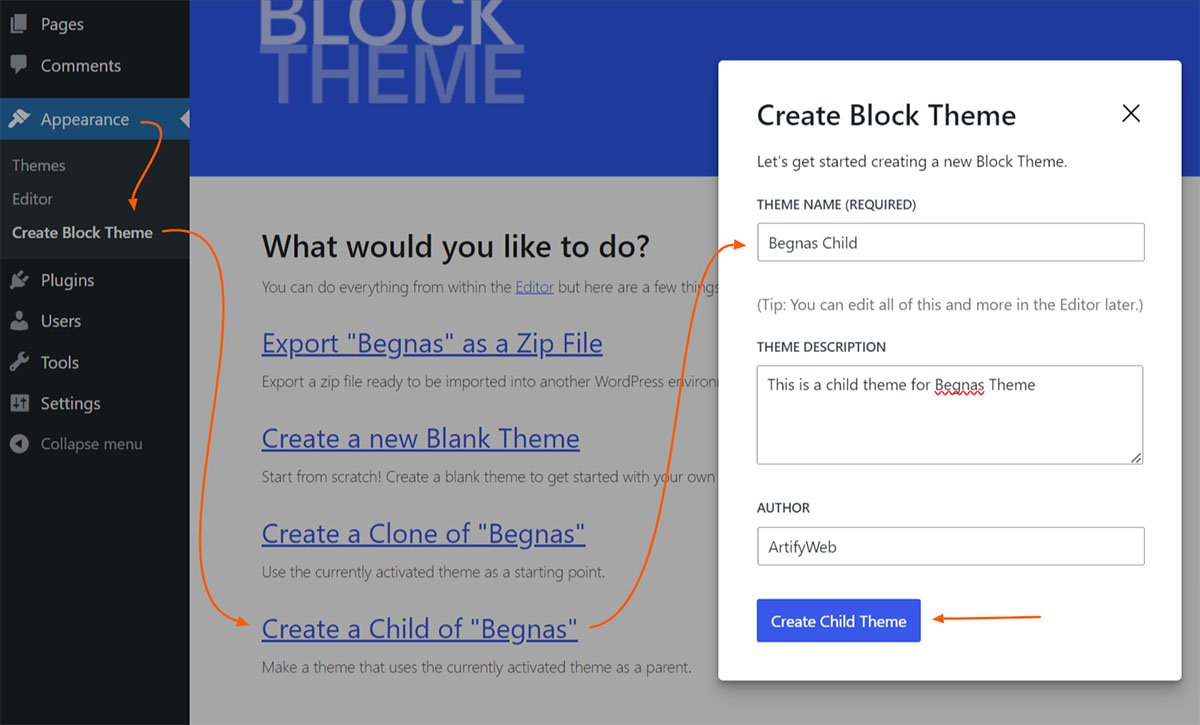
- Go to Appearance > Create Block Theme in your WordPress dashboard.
- Once the page loads, locate the link labeled “Create a Child of” (followed by the name of your current theme) and click it.
- A pop-up window will appear with some fields. Fill in the information and then click the Create Child Theme button.
- A new alert message will pop up. Just click “OK” to continue.
- You’ll be redirected to the Site Editor. This is where you can make changes to your website’s appearance. Don’t forget to save your work to apply those changes to your new child theme!
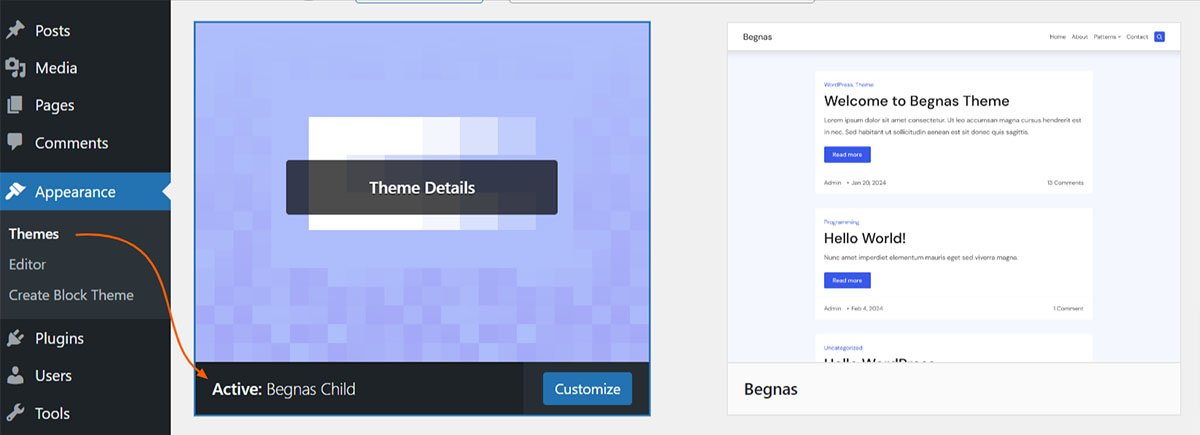
- Now, the child theme for your previously activated block theme is created and ready to use. You can check and confirm it by going to Appearance > Themes, where you’ll see the new child theme you created listed as active.
By following these steps, you’ll have a child theme up and running in no time! This way, you can personalize your website without worrying about affecting the original block theme.